Getting Started With Wildlife Wood Carving in Raleigh, NC
Learn wildlife wood carving in Raleigh, NC with hands-on guidance for beginners and intermediate artists, focusing on birds, form, detail, and finishing skills.
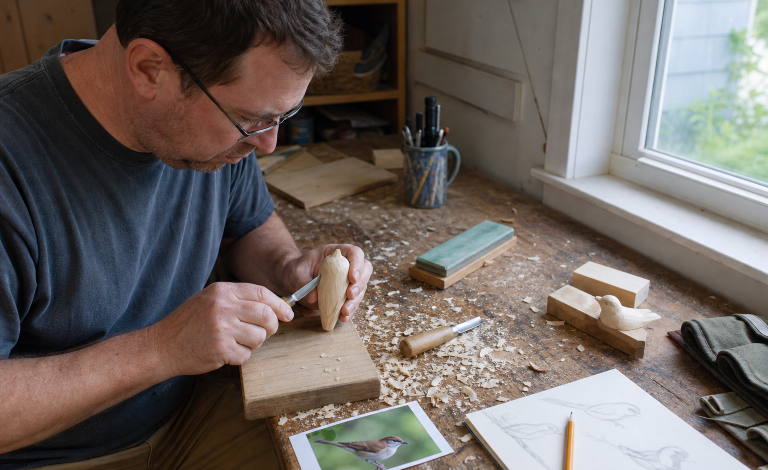
Key Takeaways
- Beginners can start wildlife carving with a small project, soft wood, and a short list of dependable tools.
- Sharp tools, safe hand placement, bright lighting, and patient practice matter more than owning many supplies.
- Studying local birds from several angles helps a carving feel balanced and believable.
- Start with large shapes, then add smaller forms and surface texture only after the proportions look right.
- Classes, carving groups, and progress feedback can help new carvers improve faster.
Wildlife wood carving is a rewarding fit for Raleigh because it brings together art, observation, and the natural subjects found across North Carolina’s parks, greenways, ponds, and wooded neighborhoods. Beginners who want hands-on guidance can explore a wood sculpture class Raleigh NC, through Vic Kirkman Originals, also known as the Vic Kirkman School of Wildfowl Art. Its Raleigh-area studio instruction is designed for beginner and intermediate carvers and focuses on wildfowl, decoys, wildlife sculpture, artistic form, detail, and finishing techniques.
That combination of careful observation and practical making is what makes bird carving especially satisfying. A simple carved wren, duck, or songbird begins as a block of wood, but it becomes more convincing as you learn to see the body’s balance, the placement of the head, and the way feather groups flow across the form.
Why Wildlife Carving Makes A Strong First Craft
Carving combines drawing, sculpture, problem-solving, and hand skills in one approachable practice. Wildlife subjects are useful because they contain clear, large forms: a rounded breast, a tapered tail, a compact head, a curved wing, or a simple leaf-like silhouette. You do not need a full workshop to begin. A stable table, basic safety equipment, and a few hand tools can support a small project.
Wildfowl carving also has roots in functional decoys, decorative, and fine-art sculpture. As wildlife wood carving continues to reach new audiences, beginners can approach it as a study of local birds, a meaningful handmade gift, or a personal display piece.
The Starter Tools That Matter Most
Resist the urge to buy every tool at once. Start with one comfortable carving knife, a small gouge for shallow, rounded areas, a V-tool for narrow grooves, a strop with sharpening compound, fine sandpaper, and simple layout supplies such as a pencil, ruler, tracing paper, and a notebook.
A hand-carving setup relies on knives and gouges for gradual removal and close control. A power-carving setup may use rotary tools for roughing out and texturing, but it also requires stronger dust control, eye protection, and more practice. For most first projects, a sharp hand tool teaches useful control. Add larger gouges, burning tools, clamps, cradles, or rotary equipment only when a project gives you a clear reason to use them.


Choosing Wood For A First Project
Soft, close-grained wood is generally easier for beginners to shape cleanly. Basswood is widely used for detailed carving because it cuts predictably. Tupelo is often used for bird carving and can handle fine texturing. Pine is affordable and available, though knots and stronger grain changes can complicate delicate work. Harder woods can yield more durable results, but they require greater force and sharper technique.
Before buying or cutting a blank, inspect it for:
- Few visible cracks or checks.
- Clear grain direction.
- No loose knot near a bill, tail, foot, or other thin feature.
- Enough extra material around the pattern.
- Wood that feels stable and suitable for carving, rather than freshly wet.
Setting Up A Safe Carving Space
Workbench Basics
Use a sturdy work surface that does not shift during a cut. Keep the piece at a comfortable height, light it with a bright, adjustable lamp, and protect cutting edges when storing tools. A non-slip mat, clamp, or simple cradle can keep the blank from twisting while you work.
Personal Protection
Wear eye protection when chips may fly, especially with powered tools. Use dust collection, ventilation, and appropriate respiratory protection when sanding or power carving. A properly fitted carving glove can add protection, but it does not replace control. Keep both hands out of the blade’s path and stop when you become tired.
A sharp tool often requires less force than a dull one, making controlled cuts easier. Still, sharpness is not a substitute for safe technique. Make small cuts away from your supporting hand, and reposition the work rather than forcing an awkward angle.
How To Study A Bird Before Carving
Raleigh carvers have plenty of opportunities to observe birds, from backyard cardinals and chickadees to waterfowl near local lakes and wetlands. Work from several clear reference images rather than a single photograph. Look at the bird from the side, front, rear, and above. Mark the head, shoulder, breast, belly, tail, legs, and centerline before thinking about individual feathers.
Build A Simple Reference Board
- Choose one species and one relaxed pose.
- Collect five to ten useful images.
- Sort them by pose, anatomy, color, and feather detail.
- Sketch the large shapes before drawing fine details.
- Keep the images close to the bench for frequent comparison.
Practice Cuts Every Beginner Should Learn
Use scrap wood before starting the actual carving. Practice straight stop cuts, angled slicing cuts, V-cuts, shallow scoops with a gouge, relief cuts, and controlled rounding. Pay attention to grain direction. When the surface begins to tear, reverse the direction of the cut, take a lighter pass, or sharpen the tool.
A quick practice drill can take five minutes: draw three lines, make shallow stop cuts along them, repeat from the opposite side, then round one small square into a smooth form. Examine the result for chatter, torn grain, or uneven pressure.
Picking A Manageable First Project
Choose a small, rounded subject with a simple silhouette and few fragile projections. A resting bird, mushroom, leaf, low-relief animal, or compact duck form is easier than a bird in flight. Avoid thin legs, wide open wings, deep undercuts, and highly complex poses until your tool control improves.
A good first project has clear references, affordable wood, room for minor corrections, and a scale that can be completed over several short sessions. Small wildlife forms can provide a useful path from basic knife work toward more detailed animal projects.
A Simple Step-By-Step Carving Process
1. Transfer The Main Pattern
Place side and top views on the blank, then mark a centerline. Check the overall proportions before removing wood.
2. Remove Large Areas First
Take off excess material in stages and leave the form slightly oversized. Rotate the carving often to check balance and symmetry.
3. Build Main And Secondary Forms
Shape the head, body, breast, belly, tail, wings, and bill before adding texture. Keep fragile areas slightly thick until late in the process.
4. Add Detail And Finish
Suggest feather groups with varied lines instead of covering every surface with identical marks. Remove dust, inspect under strong light, and test paint or finish on scrap wood before applying thin layers to the carving.
Common Beginner Mistakes And Better Fixes
- Removing too much wood: Pause often and compare the form to the pattern.
- Torn grain: Reverse direction, reduce pressure, and sharpen the edge.
- Uneven proportions: Check the piece from multiple views.
- Flat feather texture: Use grouped layers with varied depth and spacing.
- Hand fatigue: Loosen your grip, take breaks, and avoid marathon sessions.
- Too much equipment: Buy the next tool only when your current project requires it.
Finding Feedback, Classes, And Community
Local carving clubs, art centers, maker spaces, and woodworking groups can provide feedback that is difficult to get on one’s own. An experienced carver may notice a grip issue, an unsafe hand position, or a missed proportion before it becomes a major problem. Share progress photos, not only finished work, and keep a project journal with notes about wood choice, tools, challenges, and successful techniques.
Building Skill One Small Cut At A Time
Wildlife wood carving rewards patience more than speed. Begin with a sharp tool, a safe setup, soft practice wood, and a subject you genuinely want to study. Early mistakes are part of learning. With every controlled cut, you build the observation and confidence needed to turn a simple block into a sculpture with life and character.